When you’re starting out in the veggie patch, one of the first questions nobody warns you about is: do I sow this seed directly into the ground, or do I raise it in a little pot first and transplant it later?
It sounds like a minor detail. It is not a minor detail.
Get it wrong and you’ll either have seeds that never germinate, seedlings that go into shock, or – one experience I’ve suffered many times – a beautifully raised seedling that you transplant with great ceremony and then watch quietly die over the next four days.
The good news: there’s a few key principles that help unpack the logic.
🪴 Direct Sowing: Straight Into the Patch
Direct sowing means exactly what it sounds like – you skip the whole tray-and-potting-mix situation and push the seed straight into the soil where it’s going to live.
Some plants strongly prefer this. They have long taproots or delicate root systems that really don’t like being disturbed, and transplanting them – even carefully – sets them back badly or kills them outright.
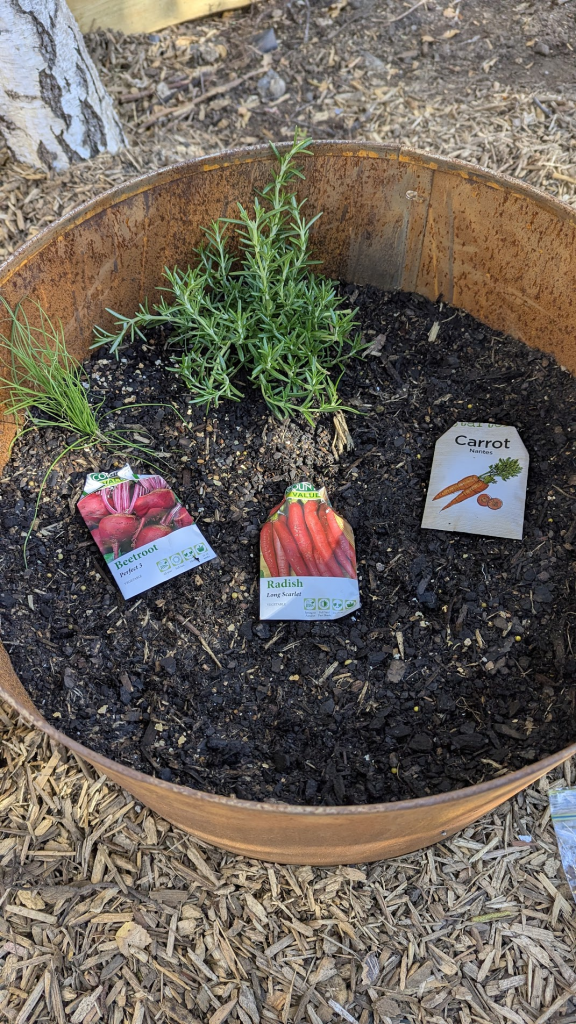
Direct sow these:
- Carrots, radishes, beetroot, parsnips (anything with a taproot – they hate being moved)
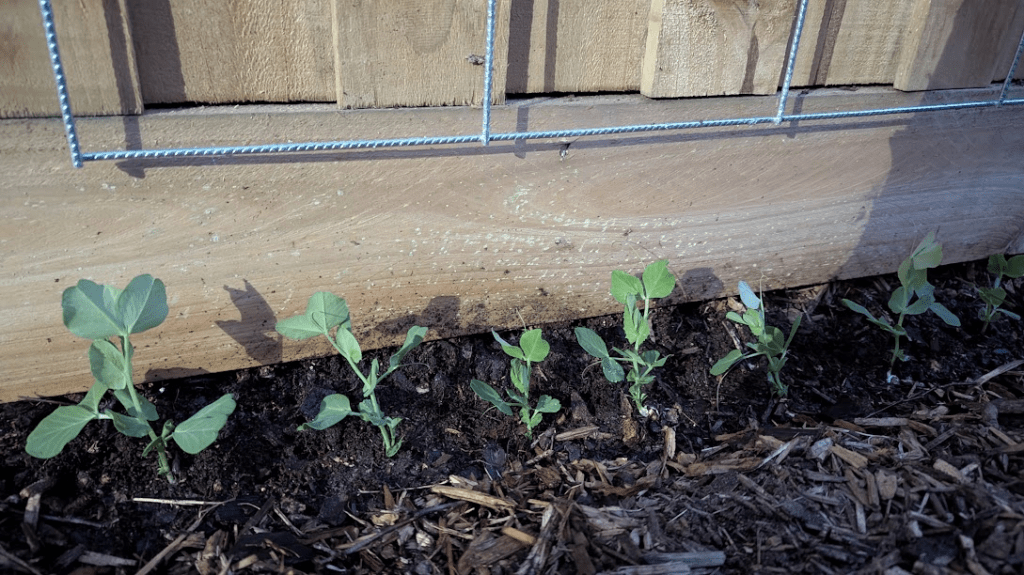
- Beans and peas (fast, easy germinators that establish quickly)
- Zucchini and cucumber (can be raised indoors but do fine direct sown in warm soil)
- Corn (doesn’t transplant well and needs to be in its final position)
- Coriander (bolts almost immediately if transplanted – just scatter the seeds)
When to direct sow: When the soil is warm enough for that plant’s needs and there’s no frost risk. Cold, wet soil will rot seeds before they even get started.
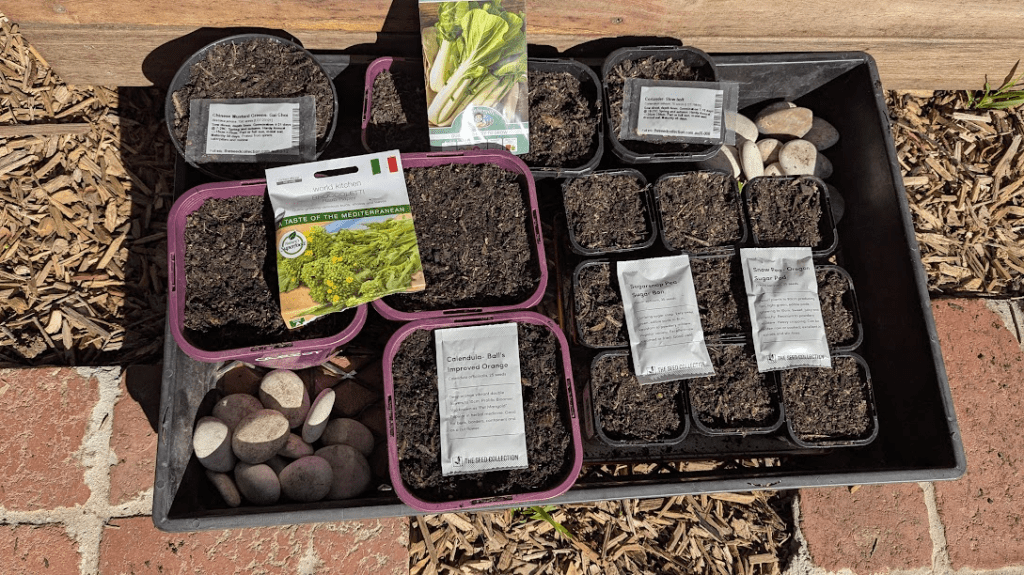
🌿 Raising Seedlings: The Head Start Method
Raising seedlings indoors (or in a sheltered spot) is about giving slow-growing or frost-sensitive plants a head start before conditions outside are right for them.
It’s also a great way to protect expensive or hard-to-find seeds – rather than scattering them directly into a patch where they might get eaten by slugs or washed away, you give each one its own little tiny house and a controlled environment.
Raise seedlings for these:
- Tomatoes, capsicum, chillies (slow to mature – need weeks of head start)
- Brassicas – broccoli, cauliflower, cabbage (benefits from controlled start, easier to protect from pests)
- Eggplant (very slow, needs warmth – start these early indoors)
- Basil (frost sensitive, loves a warm indoor start)
- Leeks and onions (tiny seeds that benefit from the extra TLC of a seed tray)
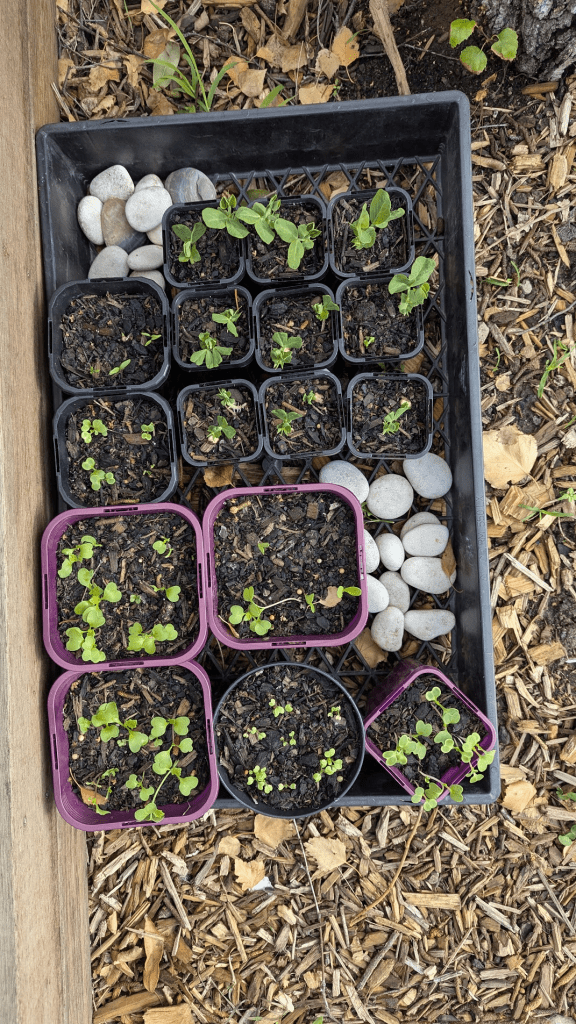
🍃When to transplant your seedlings
When a seed first germinates, the very first leaves that appear are called seed leaves (or cotyledons). These aren’t “real” leaves — they’re actually part of the seed itself, stored energy to fuel that first burst of growth. They usually look round, pale, and a bit generic. Every seedling looks basically the same at this stage.
The true leaves come next. These are the plant’s actual first leaves – the ones that look like a miniature version of what the plant will eventually become. A tomato’s true leaves look like a tiny tomato plant. A basil’s true leaves smell like basil. A broccoli’s true leaves look like little broccoli leaves.
Why does this matter? Because your seedling is not ready to be transplanted until it has at least 2–4 true leaves. A handy rule of thumb: when the seedling is roughly the height from the tip of your index finger to your first knuckle, it’s usually about the right size to move. Before that, it’s too fragile, too small, and too reliant on those seed leaves to cope with the stress of being moved. Rushing this step is one of the most common reasons seedlings fail after transplanting.
When you see those true leaves emerge and that little plant is starting to look like a proper (if tiny) version of itself – that’s your green light.
🚜 How to Transplant Seedlings Without Killing Them
Transplanting is a stressful moment for a plant. Your job is to make it as undramatic as possible.
1. Harden them off first
If your seedlings have been raised indoors or in a very sheltered spot, they need to gradually get used to outdoor conditions before going in full time. Put them outside in a sheltered spot for a few hours a day, increasing the time over about a week. Skipping this step and plonking them straight into the harsh outdoors is the equivalent of going from your couch directly into a half marathon. Nobody’s surviving.
2. Choose the right moment
Transplant in the evening or on a cool, overcast day – never in the middle of a hot afternoon. The goal is to minimise stress, and direct afternoon sun right after transplanting is brutal on a freshly disturbed root system.
3. Water the seedling before you move it
Water the seedling in its tray or pot an hour or so before transplanting. Moist soil holds together better around the roots, which means less disturbance when you lift it out.
4. Dig the hole first
Have the hole ready before the seedling is out of its tray. You want the root ball in the ground as quickly as possible – don’t leave it sitting out in the air while you scramble around with a trowel.
5. Handle by the leaves, not the stem
If you need to handle the seedling directly, hold it by a leaf, not the stem. Leaves are replaceable. A snapped or crushed stem is not.
6. Plant at the right depth
Most seedlings go in at the same depth they were growing. Tomatoes are a notable exception – they can be buried quite deep (right up to their lower leaves) because they grow roots all along their buried stem. More roots = stronger plant.
7. Water in gently and thoroughly
Give them a good drink straight after transplanting, directly at the base. This settles the soil around the roots and gets things off to the right start.
8. Give them a few days grace
Don’t panic if your freshly transplanted seedlings look a bit sad and droopy for the first day or two — this is called transplant shock, and it’s normal. Keep them out of harsh sun if possible, keep the soil moist, and give them a few days to settle in before you start worrying.
Are you a direct sower or a seed-raiser? Or a bit of both depending on the season? I’d love to know your approach – drop it in the comments below!

Leave a comment